
When you purchase songs and albums from the iTunes Store, they will automatically have the right information attached to them: track name (song title), album name, artist, duration, etc. But iTunes lets you rename songs and albums in your library very easily: this is especially useful when you import music into iTunes, since some MP3's may not always have all information, or the correct information. In this tutorial, we will show you two ways to rename songs or albums in iTunes.
- In this iTunes tutorial:
- Rename a song or album in your iTunes library
- Rename an entire album in your iTunes library
Rename a song or album in your iTunes library
Follow these steps to rename a song or album from iTunes' List View:
 The easiest way to rename a song or album is to do it from List View
- In iTunes' main window, click on the List View button, as shown on the screenshot
- Your music is now displayed as a list of text, with album covers optionally showing on the left
- Find the song or album you want to rename
- Give a single click on the letters of the song name or album name
- iTunes will make this field editable text:
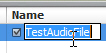
- Type a new name for the selected song or album, and hit Enter (Windows) / Return (Mac)
- iTunes now shows your song / album with the name you just typed!
The following method is ideal when renaming an entire album, and spares you from manually having to type the album title for every single track it contains. You can also rename songs that way, but it would take longer than as explained above.
Rename an entire album in your iTunes library
Here's how to rename an entire album in iTunes, and apply the new name to all tracks:
- Choose to List View (see above) inside iTunes
- Then, sort your music by Album (click on the Album column - if it is not visible, right-click on another column, and choose "Album" from the menu to show that column).
- Now locate the album you want to rename: if you have a lot of music, the easiest way is to type the current album name in the search field (top right of iTunes' main window).
- Click on the first track of the album
- Hold the Shift key (on both Mac or Windows)
- While still holding the key down, click on the last song in the album
- All the songs are now selected
- Right-click on any of them, and choose "Get Info" from the context menu
- To avoid accidental renames of several items at once, iTunes will ask "Are you sure you want to edit information for multiple items?" - Click "Yes", and iTunes will display the Information dialog for the songs/tracks you selected.
- Make sure that the Info tab is selected
- Type the new album name inside the "Album" text field
- Click "OK", and iTunes will take a few seconds to apply the new album name to all selected tracks.
And you have successfully renamed an entire album in iTunes!