
 Just like on a Mac or Windows PC, you can take screenshots on your iPad (take a picture of the screen, and save it as image in your iPad's Photos library).
This can be extremely useful when you have problems with your iPad, and are trying to document a behavior or error messages to get tech support on them, if you are creating instructions for someone else, etc. In this tutorial, we will show you how to take a screenshot on your iPad.
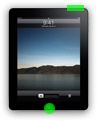
The image shown on the left of this paragraph is an actual screen capture image taken on the iPad itself (the picture was reduced in size for the purpose of this tutorial, but the screenshots you take on your iPad will be saved at the full size of the screen - what is the screen resolution of the iPad?)
Let's now get started and show you how to take a picture of the screen on your iPad.
Take a picture of the screen on your iPad
Follow these steps to take a screenshot: (Note that anything visible on screen can be saved as a screen capture, including websites, documents, settings screens, etc. - but the iPad needs to be unlocked (and turned on) in order to take a screenshot.)
- Navigate to the screen you want to save as a picture on your iPad.
- Once you have it setup exactly as you want it to appear in the image, press the following two buttons at the same time: press and hold down the "Home" button, and while doing so, press and hold down the "On/Off - Sleep/Wake" button, as shown on the screenshot below:
- Then, release both buttons at the same time: your iPad's screen will become white-bright, to simulate a camera flash effect, and if your volume is set to a loud enough volume, you will also hear a picture sound: this is your visual confirmation that the iPad successfully took and saved the screenshot.
- The screenshot was automatically saved as an image file inside your iPad Photos library. To get to the library, either tap on its icon in one of your Home screens (or type "Photos" in the search field of the screen before the iPad's first (leftmost) Home screen).
- Flick with your finger to scroll to the very bottom of the listing of images (newest images are displayed at the bottom), and you will find the screenshot you just took. You can now use that screenshot as you would any other image inside on your iPad: you can email the photo, assign it to a contact (as profile picture), use the image as wallpaper, or copy it to paste it in another application on your iPad.
This is how easily you can take screenshots on your iPad!