
Your iPad comes with a sizeable flash drive, but files (and in particular, pictures in your Photos library) tend to accumulate and take an increasing amount of space. A later tutorial will explain how to transfer photos from your iPad to your computer, but especially if you are on the road, you may need to know how to delete a picture from your iPad Photos library. This tutorial shows you how.
Permanently remove a picture from your Photos library
Follow these steps to delete an image file on your iPad:
 You will first need to load the "Photos" app: either tap on the Photos icon on one of your Home screens (the button with the sunflower image, as shown on the screenshot), or click twice on the Home button to search for "photos" in the text field. Your iPad will open your photo galleries, with the "unclassified" pictures selected by default.
- If the picture you want to delete is in a particular album, tap on the "Albums" button at the top and open that album. Otherwise, flick with two fingers to scroll up or down in the "Photos" listing: newest images are displayed at the bottom, and the oldest one at the top. Once you have found the photo to remove, tap on the selection button:
- Now tap once on the picture to delete, and your iPad will display a blue checkmark icon in overlay, to confirm your selection. Finally, tap on the "Delete (1)" button that appeared at the top, and is now enabled (was grayed out, or disabled, until you selected at least one image). The number one (1) shown between parentheses is your iPad's way to tell you that one image file is currently selected.
- Your iPad will display a final "Delete Photo" red confirmation button: tap on it, and the selected picture will be permanently removed from your Photos gallery.
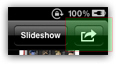
Tip: you can also delete a picture while you are viewing a slide show on your iPad. Just tap once on the picture you want to delete when it is visible in the slideshow, and tap on the trash can icon in the top right corner: confirm the deletion by tapping the "Delete Photo" confirmation button that appears below.
Note: Although once you know how to delete a picture the process becomes automated, make sure to always double-check that the correct photo is selected for deletion before your proceed: a deleted image from your Photos library cannot be restored unless you have created a backup of it through iTunes (when your iPad was last backed up), or by using third party software to restore iPad deleted files, which is a hit-or-miss in many cases.
This is how easily you can delete a picture from your Photos library and permanently remove it from your iPad; in the next tutorial, we will show you how to delete multiple photos at the same time from your iPad.